


You don't have to take your car into the shop for all your car problems. You can save a bundle by doing these 10 simple repairs yourself using replacement parts and ordinary hand tools.
10 Car Problems You Can Easily Fix Yourself
1
/
10

Replace Engine Air Filter
Air filters should be replaced every 30,000 to 45,000 miles, or according to the instructions in your vehicle’s owner’s manual — and it’s an important task to keep up on.
“Air filters protect engine health by collecting dust and debris, and over time, they can become clogged and choke your engine,” says Duane “Doc” Watson, a technical trainer at Bosch Mobility Aftermarket. “This can cause your car to misfire, jerk when you accelerate or even result in smoke coming out of your exhaust pipe.”
Most newer cars have a sensor that will trigger a light on your dash when the air filter needs to be changed. “You’ll also notice higher fuel consumption, possible poor acceleration and you might have issues starting your vehicle,” says Bausch Lent. “This is a regular maintenance task that should not be ignored.”
To inspect and replace your engine air filter, just unscrew or unclip the air filter box retainers and remove the old filter. Then check the filter to see how much light passes through by holding a shop light behind it. If the filter blocks 50 percent of more of the light, replace the filter. If not, put it back in, secure the air filter box cover and keep driving. It’s one of the easier things you can do to fix up cars.
2
/
10
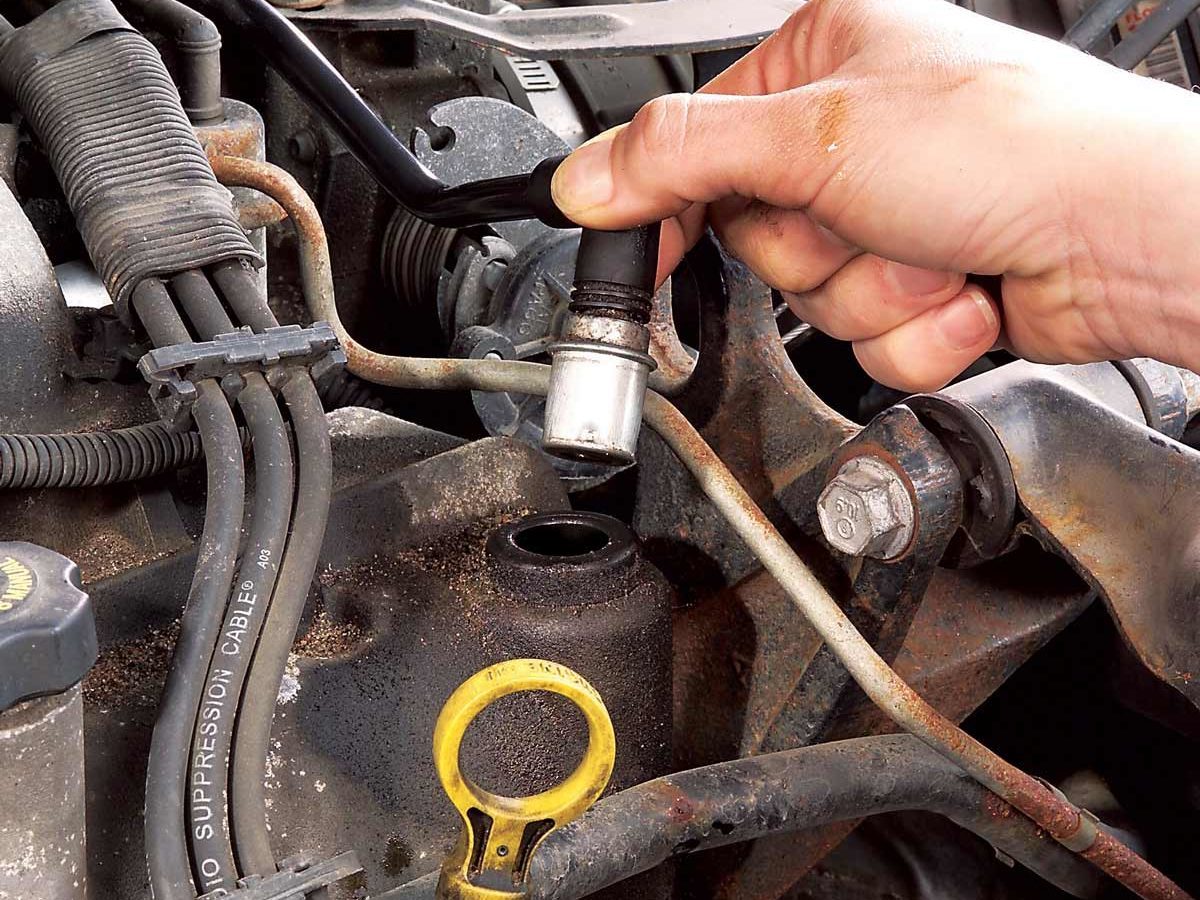
Replace Your PCV Valve
The positive crankcase ventilation valve (PCV) regulates the flow of flammable crankcase vapors back into the engine so they can be burned safely. The valve is designed to close in the event of an engine backfire to prevent catastrophic engine damage. As they age, the PCV valve accumulates carbon buildup and the spring loses tension, putting your engine at risk. Refer to your car's maintenance guide for recommended replacement intervals. Most PCV valves can be replaced simply by wiggling the valve out of the rubber grommet and disconnecting it from the vacuum hose. Then insert the new valve and reinstall. It's that simple when you fix up cars. Click here to get the full scoop on whether you need to replace your PCV valve.
3
/
10
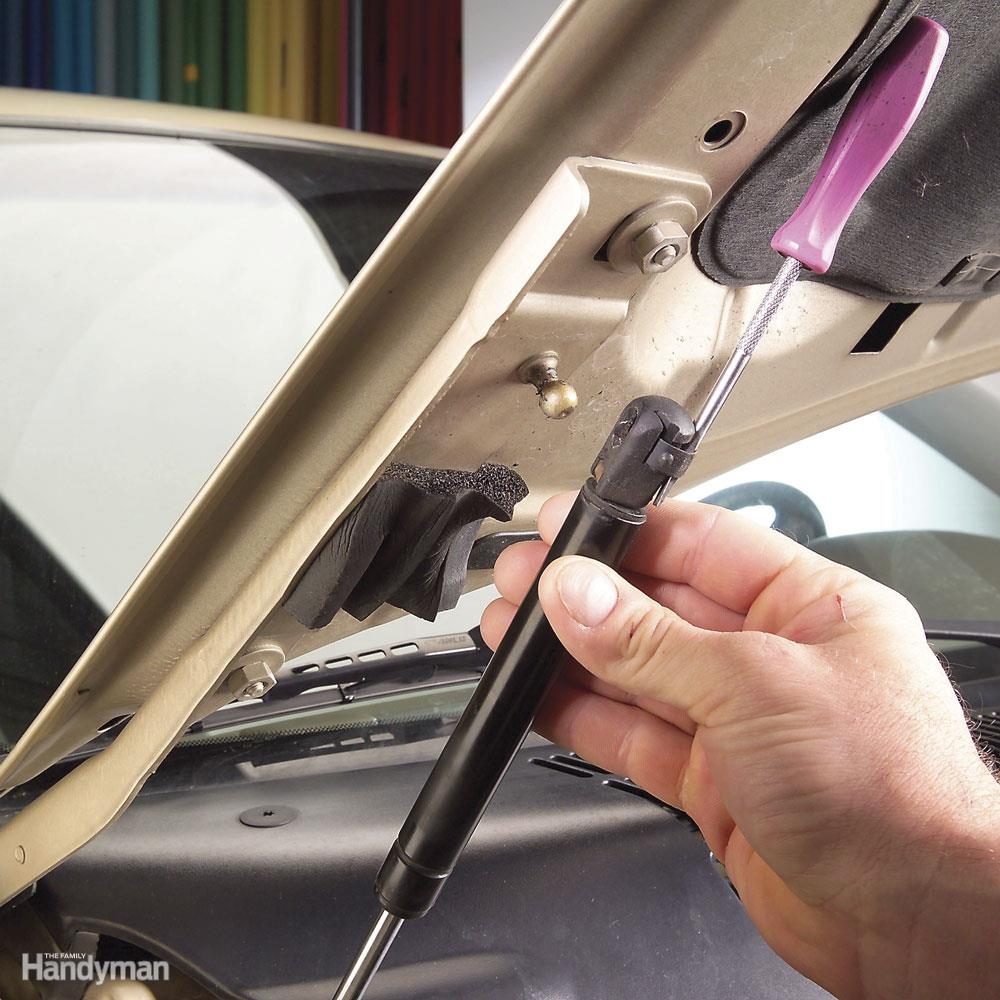
Gas Lifts
Why risk your noggin when you can replace gas lift cylinders yourself? Just buy new lifts at any auto parts store. Then have a helper hold the hood or liftgate while you disconnect and replace the worn lifts. Many styles simply unbolt using a metric socket set. Others connect with a ball and socket style connection held in place with a spring clip. To disengage the spring clip, simply shove a small flat blade screwdriver between the clip and the cylinder. Then pull the cylinder off the ball stud.
4
/
10
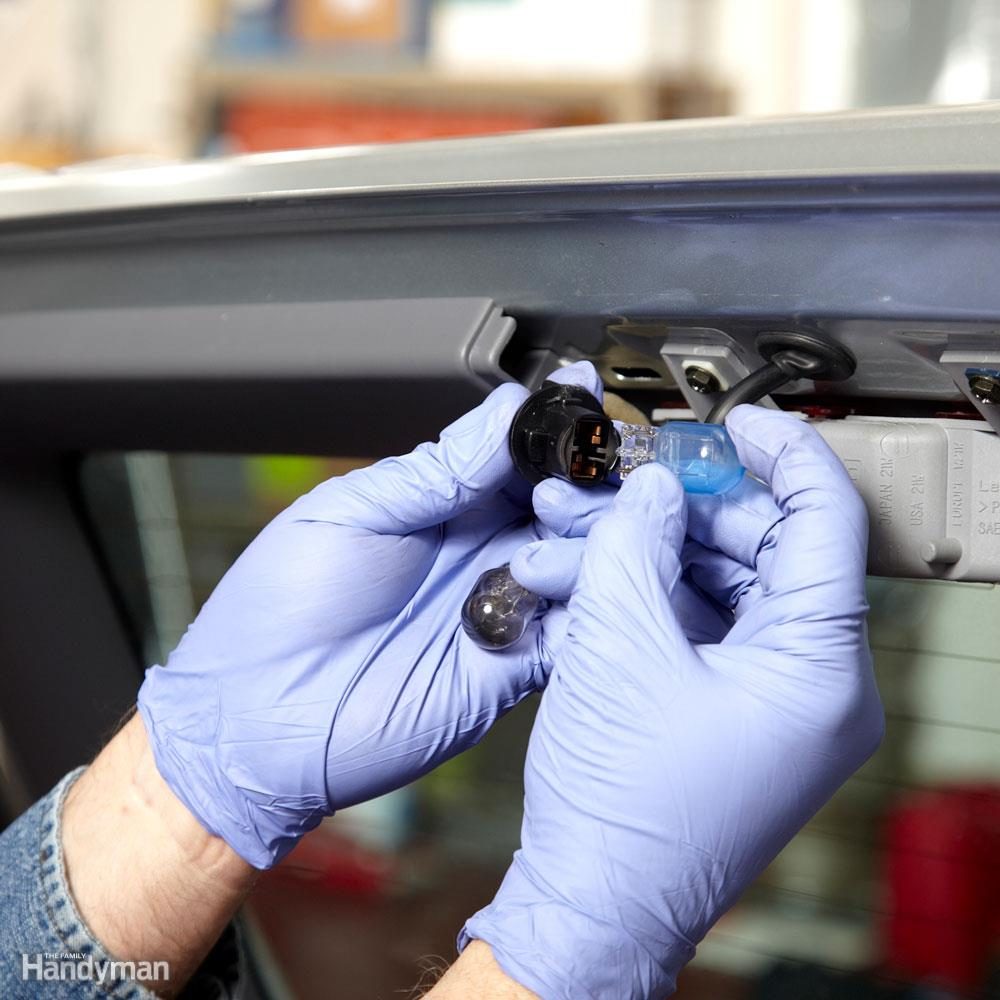
Replace Non-Headlight Bulbs
To access burned out license plate, side marker and fog light bulbs, just remove the retaining screws and pry off the lens. Pull the bulb straight out of the socket. Handle the new bulb with gloved hands or hold it with a paper towel to prevent skin oils from depositing on the thin glass — that can cause premature bulb failure. Then push the bulb into the socket until it clicks. Reinstall the lens and you're done. Get more info on changing auto light bulbs here.
5
/
10

Replace That Broken Antenna
Newer cars don’t have traditional antennas. Instead, antennas are infused into vehicle bodies, and sometimes surface as a shark fin on the roof. That’s because “Radio towers are now able to send stronger signals, and the receivers inside our cars have gotten stronger, too, so we no longer need large antennas on top of our cars to receive those signals,” says Watson.
But if you do have an old-school antenna, and even a power one, replacing it is pretty easy. If it’s a fender mount antenna, just unscrew the remaining portion of the mast and buy a replacement mast at any auto parts store. Replacing a pillar mount antenna is a bit more involved but is still a DIY fix. Disconnect the antenna cable from your radio and connect heavy string to the end. Then unscrew the antenna mount from the pillar and pull the old antenna and the string straight out. Attach the new antenna cable to the string, pull the cable back into the vehicle and connect it to your radio. Then secure the new antenna to the pillar using the screws provided. Get step-by-step replacement instructions here.
6
/
10
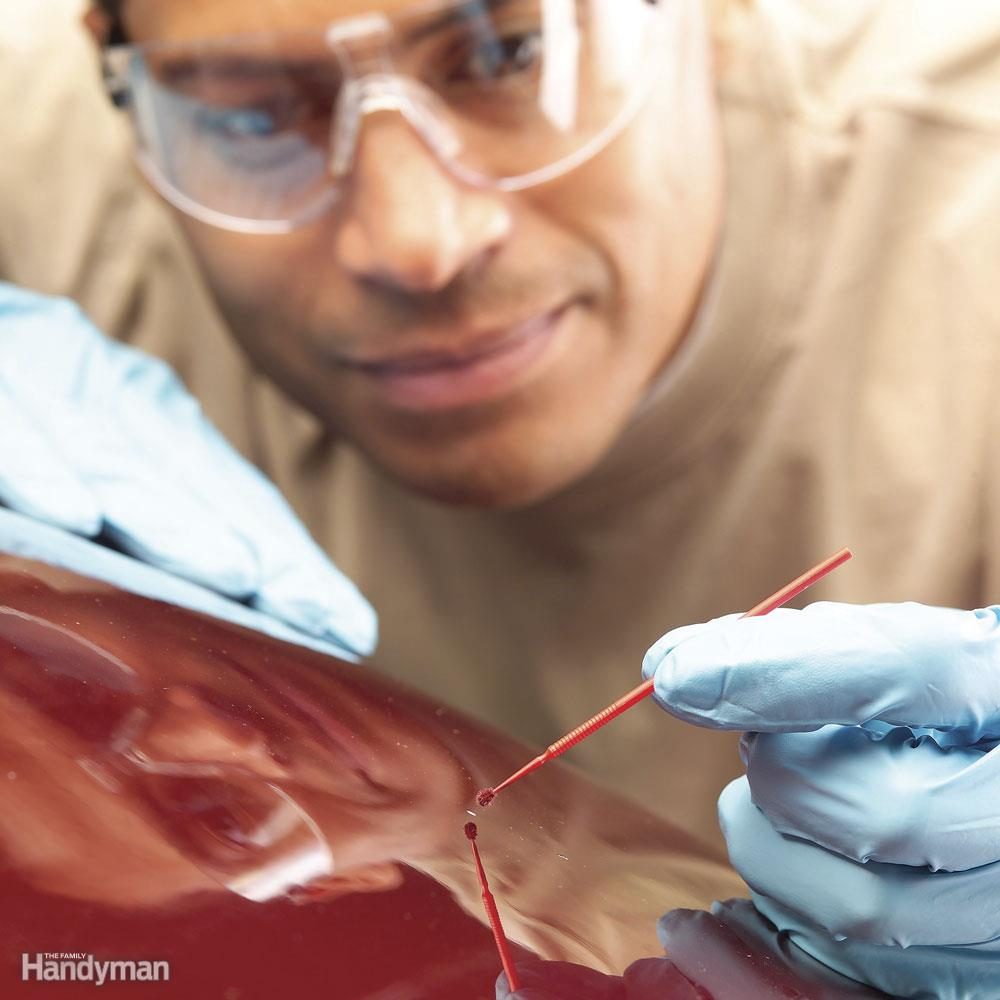
How to Touch Up Chipped Auto Paint
If you don't cover paint chips with touch up paint, they'll rust and then you'll have a much bigger problem on your hands. Repairing chipped car paint is easy. Just buy touch up paint, fine tip paint applicators and wax and grease remover from any auto parts store. Clean the chip with the wax and grease remover and let it dry. Then dip the applicator in the paint and dab it onto the chip. Don't add too much or the paint will drip. Let it dry completely and apply wax after 30 days finish your car paint touch-up.
7
/
10
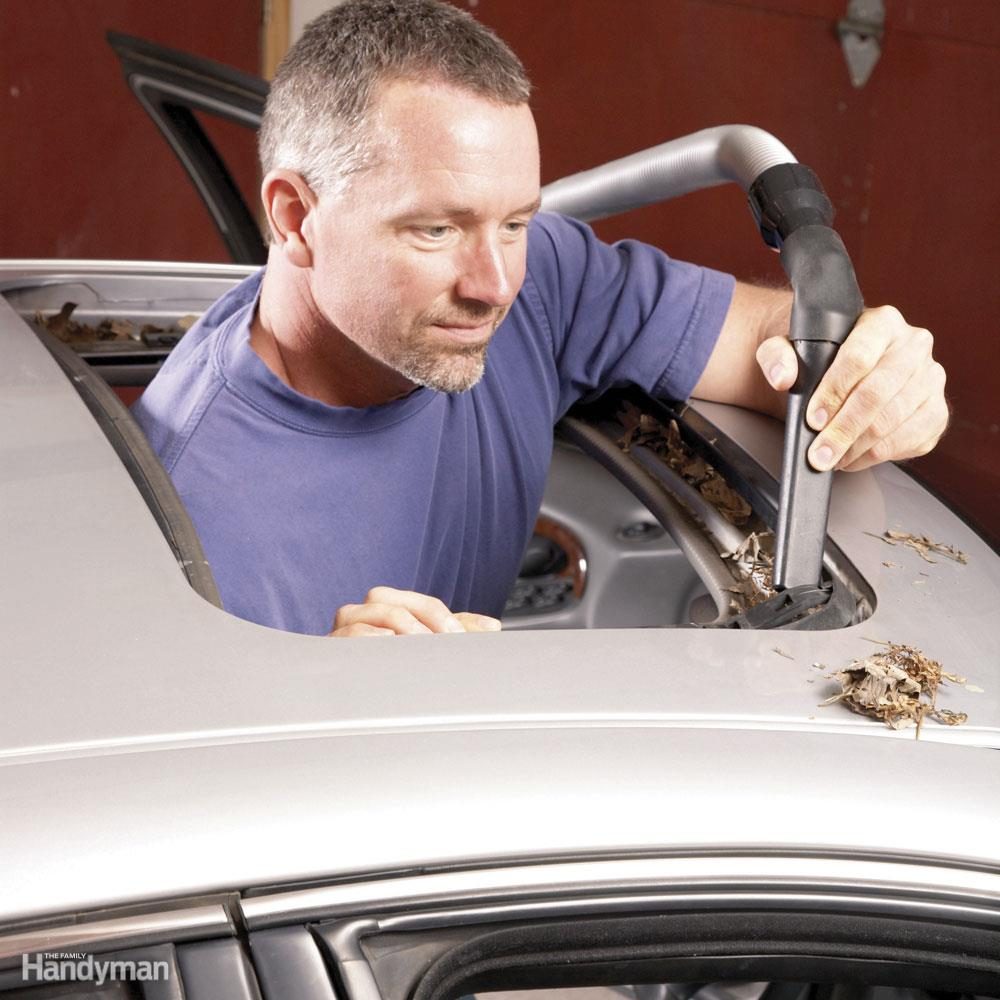
Fix That Leaky Sunroof
If raindrops keep falling on your head, it's probably because your sunroof drains are clogged. That's something you can fix yourself in just a few minutes. Open the sunroof and look for drain holes in the front and rear corners of your sunroof. Once you locate the drains, duct tape a small rubber or plastic tube to the end of your shop vacuum and suck out any debris stuck in the drains. Then dribble water into each drain and check under the car to see if it's draining onto your driveway or garage floor. If the drain is still plugged, buy a speedometer cable from an auto parts store. Insert the cable into the drain and gently push it down the drain as you spin the cable with your fingers. Don't push too hard because you can puncture the drain tubes and they'll dump water into your dash area. Flush the drain after snaking it with the speedometer cable. If it now runs free, you're done and shouldn't have any more water coming inside your vehicle.
8
/
10
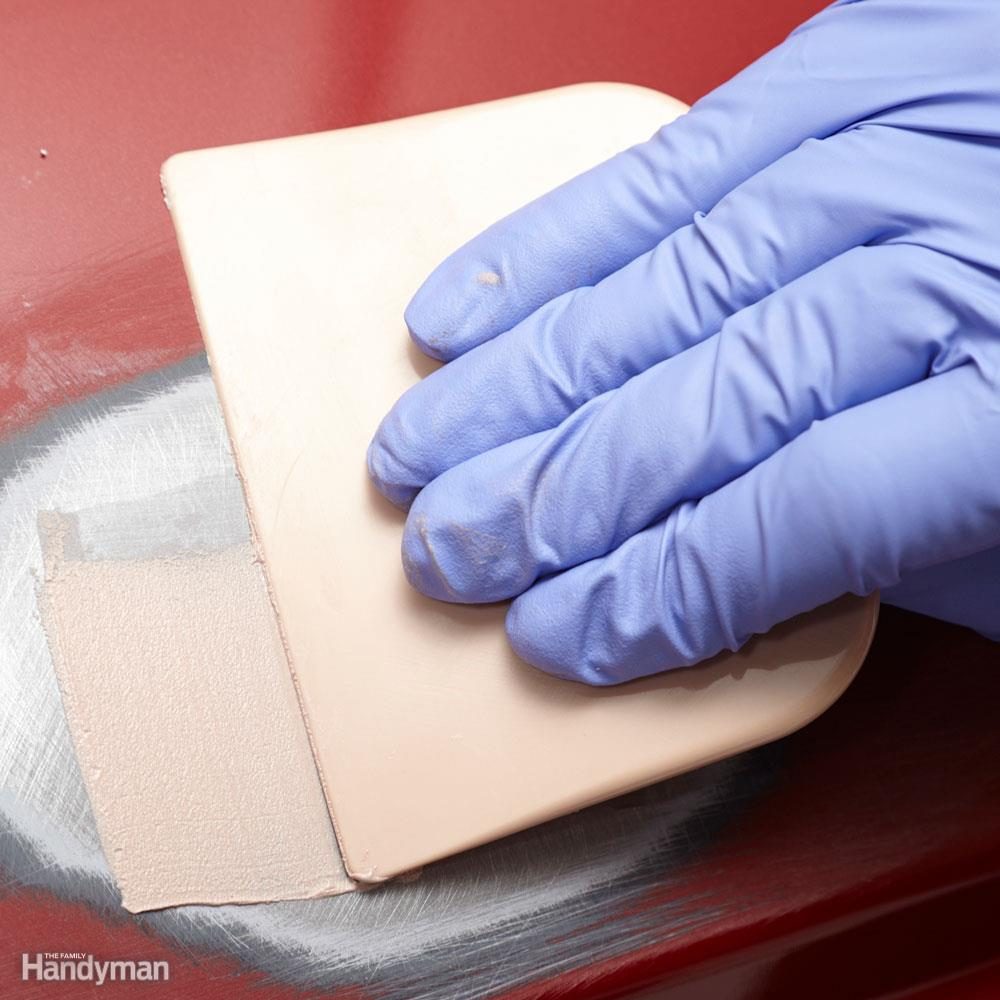
Fix Small Dents and Door Dings
If you can patch a wall, you can patch a dent in your car. You'll need various sandpaper grits, a small can of autobody filler and cream paste and plastic applicators. Start by sanding the dent down to bare metal with coarse grit sandpaper. Then feather the edges. Clean the dents with wax and grease remover. Then mix the body filler and apply a very light skim coat to fill in the sandpaper scratches. Allow the filler to set up and then build up the repair with addtional layers no more than 1/4-in. thick per application. Feather the final coat so it levels with the painted areas. After it cures, sand until smooth. Then apply a cream filler to the entire area to fill in any pinholes. Let it cure and do a final sand. Then you can paint the area with touch up paint. Learn more about fixing car dents here.
9
/
10
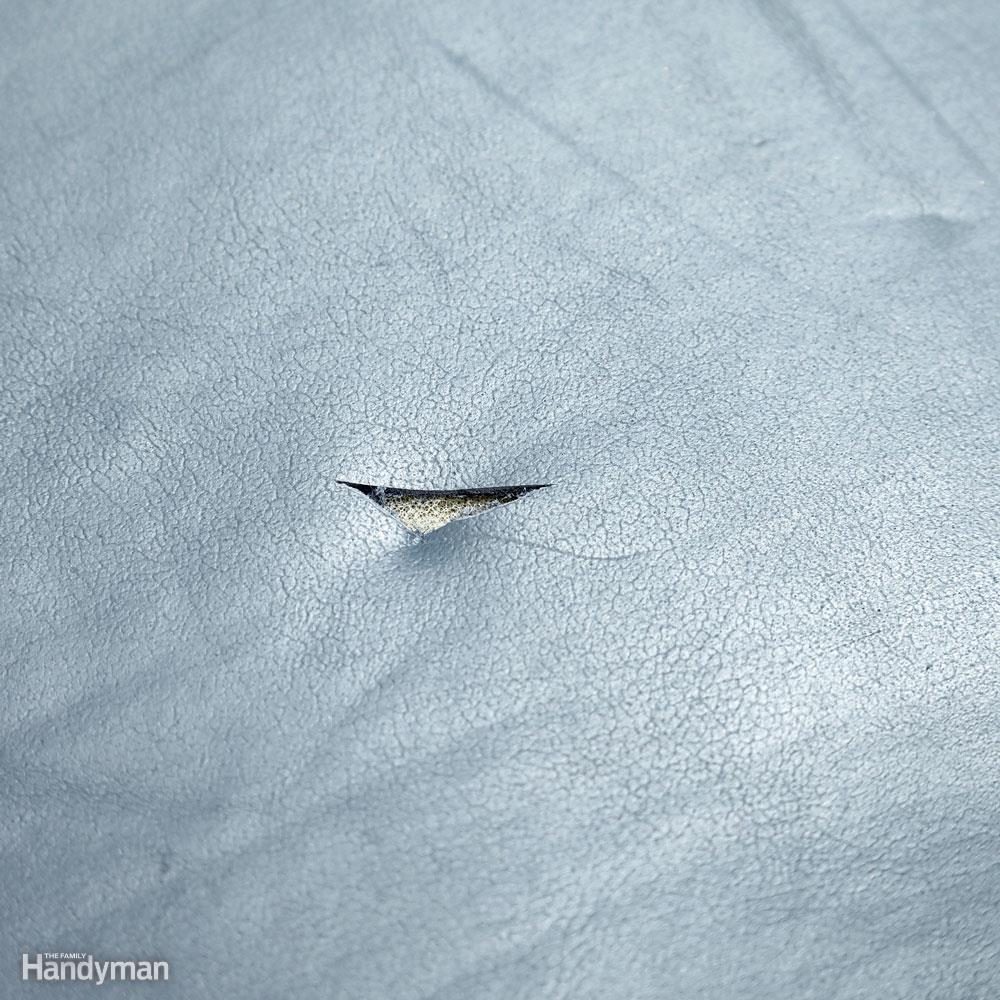
Fix Tears in Leather and Vinyl
Upholstery shops charge almost $200 to fix tears in your seats. You can do it yourself in a few hours with a vinyl and leather repair kit (less than $20) from any auto parts store. You'll have to practice a bit to get the right color mix and it might not be a perfect match when you're done, but it's a heck of a lot better than driving around with torn seats. Start by gluing reinforcing fabric onto the underside of the torn vinyl or leather. Then mix the heat-set filler to match your fabric color and apply it to the tear. Next, find a textured mat that most closely resembles the texture of your vinyl or leather and place it onto the liquid filler. Heat the patching tool with a clothes iron and press it onto the textured mat. Remove the patching tool, but leave the textured mat in place until the patch cools. Then peel it off. Learn more about the step by step process of leather repair.
10
/
10
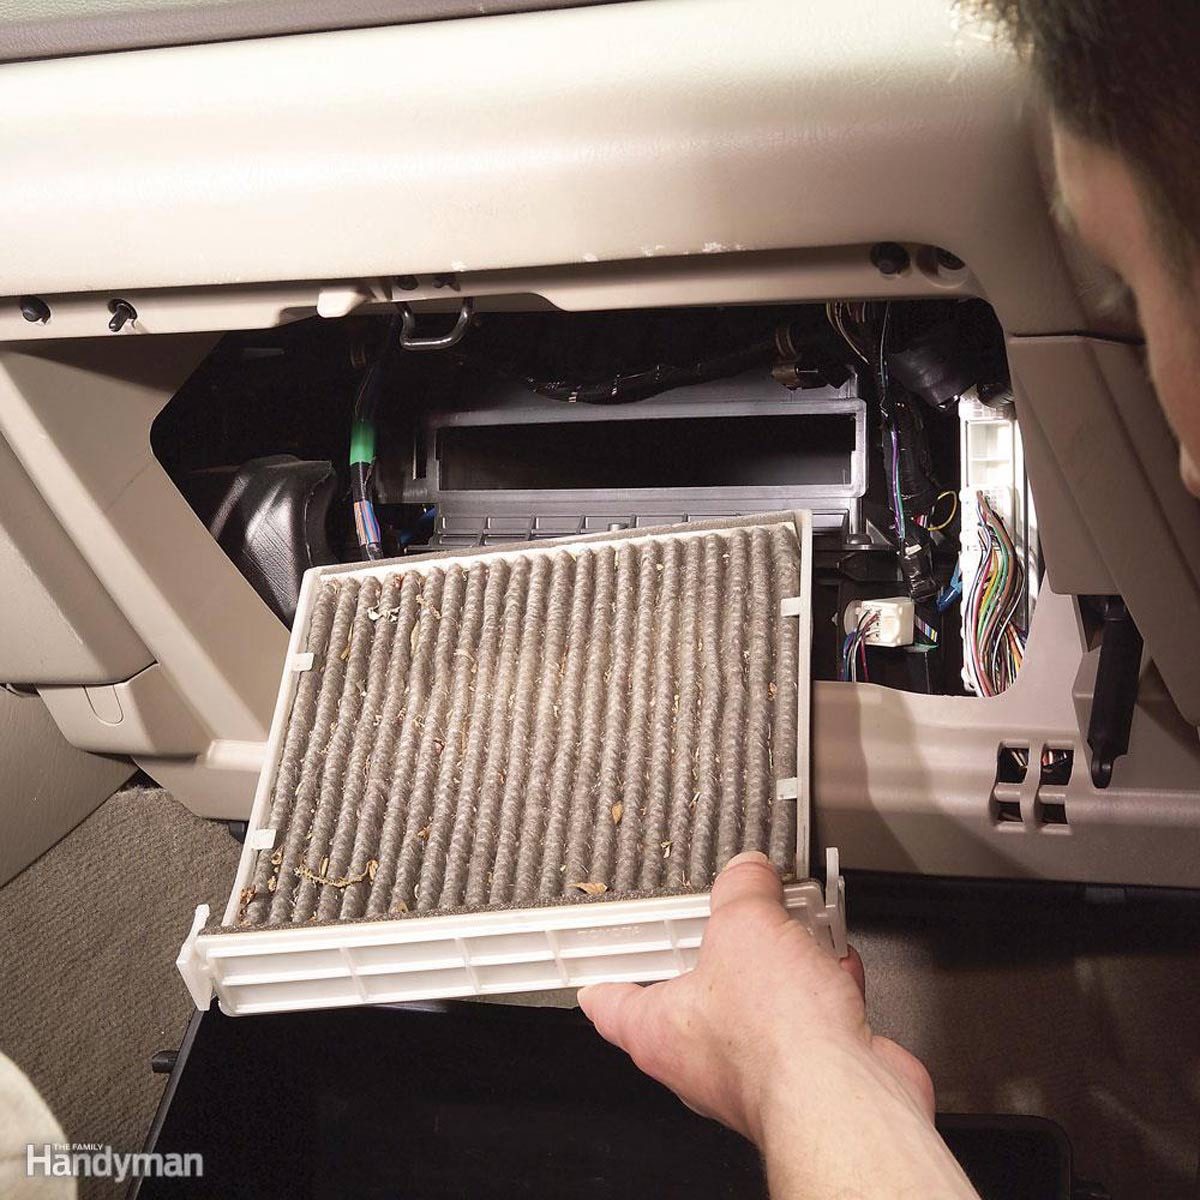
Replace Your Cabin Air Filter
A clogged cabin air filter can damage your car's blower motor and cause your AC to run longer and harder in the summer. Cabin air filters are easy to access and replace and you'll save about $30 by doing it yourself. It's one of at least 100 car maintenance tasks you can do on your own. Buy a replacement cabin air filter at any auto parts store and ask the clerk to print out the installation instructions. Cabin air filters are usually located in the air ducts behind the glove box in late model vehicles. However, some car makers locate them in the cowling or console area. Just remove the access covers and slide out the old filter. Note the direction of the airflow arrows so you can install the new filter in the proper orientation. Then reinstall the covers and you're done. See how to remove and replace your cabin air filter here.
FAQ
My check engine light is on — can I fix it myself?
Maybe, but first you need to diagnose the issue, and the best place to start is with a code reader. “Most code readers have a severity rating and will tell you if the issue is happening within the body of your car, the chassis, the powertrain or network communications,” says Watson.
Examples of issues you can probably fix at home include those involving spark plugs, air filters and the battery. Examples of issues that may require you to take your car to the shop include catalytic converter failures, transmission problems or internal engine damage.
“Either way, it’s a great idea to have a code reader on hand so you can diagnose what’s triggering your check engine light,” says Watson.
My car smells musty when I use the A/C — why?
It could point to several issues, the easiest of which is that the air filter is clogged and needs to be replaced.
“There could also be an issue with your evaporator coil or possibly moisture accumulation somewhere within your ventilation system,” says Bausch Lent. “Make sure to get this checked out sooner rather than later, as mold and mildew can bring down the value of your car.”
About the Experts
- Julie Bausch Lent is the managing editor of Car Talk, the digital content iteration of the long-running NPR show about all things automotive.
- Duane “Doc” Watson is a technical trainer at Bosch Mobility Aftermarket. He has more than 45 years of experience in automotive repair, has trained thousands of technicians and earned many industry awards, including Chevrolet Technician of the Year and Buick Service Master of the Year.